User Guide for Glendale App
User Guide
BackThe app is NOT in the app store. Click 'go to the app' and follow the instructions at the top of the screen.
User Guide
Looks Very Scary - Where do I start?
It looks like the control panel for the Starship Enterprise!
Don't panic! It looks far more complicated than it is. Read this guide and you will understand the importance of each piece of information to aurora hunting.
If you are a total novice then you don't need to look further than the message at the top of the app, which is basically just giving you a plain English summary of what all the scary-looking numbers are telling us right now.
Whenever you see the word 'substorm' substitute the word 'aurora'. Substorm = Aurora.
Keep an eye on the number that is shown below the map (substorm strength). The more negative the number, the stronger the aurora is, in the sky, right now.
All my other apps give me Kp. I understand Kp!
Kp simply does NOT work. Apps that use Kp will get lucky sometimes. Mostly, they will be consistently wrong.
The substorm strength shown on this app is a 100% accurate alternative to Kp that actually works, in real-time.
Read on and I will explain what each section of the app means. But first...
Newbie? Get a Quick Intro.
Just stick to the information at the top of the app until you have gained your confidence. The 'nowcast' at the top is giving you a simple explanation of what the current situation and prospects are.
Whenever you see the word 'substorm' substitute the word 'aurora'. Substorm = Aurora.
Underneath the 'nowcast', any alerts that the app has issued will be shown. The aurora alerts are colour-coded:
Alert Levels
| ONSET | Applicable to Northern Scotland, Iceland and Northern Scandinavia. |
| YELLOW | Applicable to Northern Scotland, Iceland and Southern Scandinavia upwards. Tasmania & New Zealand. |
| ORANGE | Applicable down to Southern Scotland, Northern England, Northern Ireland, Denmark and Lithuania upwards, Victoria. |
| RED | Applicable to the whole UK and Ireland, Netherlands, Germany, Poland, southern Canada upwards. Australia up to Melbourne. |
| MAJOR SEVERE EXTREME | Additional levels indicating exceptionally strong auroras. Do not miss these. |
Further down you will see 'live reports', which features a map showing reports of sightings across the country that have been submitted by users of the app. If there are reports of auroras from places further south of you then it is 'game on' where you are.
Map Symbols
 | Cloud - Obvious... it's cloudy. |
 | Red Cross - Sky is clear but there is no aurora on camera. |
 | Pink Tick - Diffuse aurora (red/pink only with no green on camera). |
 | Green Tick - Aurora on camera. |
 | White cloud on Blue Background - Noctilucent clouds seen (this is a summer thing). |
Keep an eye on the number that is shown below the map (substorm strength). The more negative the number, the stronger the aurora is, in the sky, right now.
If you swipe right/left on the map, it will toggle between the UK, Iceland, Scandinavia, Canada and Australia/New Zealand.
At the bottom of each panel on the app there is a help button that will give you a basic explanation of what it means.
Colour Coding
All of the scary figures on the app are colour-coded to tell you how important they are:
| Yellow | GOOD |
| Orange | GREAT |
| Red | FAB |
| Purple | AMAZING |
When something important is happening, the panels will open and lots of numbers will be lit up in pretty colours.
Now lets look at each panel in detail and understand what it is telling us BUT first...
Why is it the ONLY accurate aurora app?
It uses ground-breaking scientific research and models, that are not available anywhere else, to provide totally accurate aurora alerts and forecasts.
It does things totally different to all other websites and apps by tracking the actual substorms that cause auroras in real-time, significantly out-performing all data and alerts provided by other apps, official scientific agencies and universities.
How do I install it? Is it an App or isn't it?
It's not in the App Store, so how can it be an app?
There are two kinds of apps, 'native' apps and 'web' apps.
Native apps are what come through the App Store and were designed by phone manufacturers to tie customers to their particular brand of phone. A native app will only run on one maker's phones. Developers need special tools and software to produce them and, hence, you will often be charged to download them. A native app has to be produced for every device, and often operating system version, that the developer wishes to support, so it is very time-consuming and expensive to produce them. Developers have to pay to put them in the app stores.
Web apps are internet-based apps that can be installed and run on any device, not just phones but tablets, desktop PCs and laptops too. Web apps can now do virtually everything that native apps can do, including accessing your GPS, gyro-compass and notification system. The only difference is the way that you download and install them. Once installed, they look and behave exactly like native apps.
How do I get the thing on my phone then?
Visit the app in the web-browser on your phone. Use Chrome or Safari. It will look just like you've visited any other web-page. You can bookmark it just like a web-page. However, that is NOT the way to do it! If you click the install button or the little icon in the top right of the browser that is three vertical dots (or a square with an arrow on iPhones), a little menu will appear and one of the options is 'Add to Start/Home Screen'. If you click that, the app gets packaged up like a native app and installed onto your phone. You will get an icon for it on your start screen, just like all your other apps.
The app is here: https://aurora-alerts.uk/
I don't believe it's an app!
On an Android phone installing the app, by clicking the install button on the site or adding the site to your home screen, automatically generates the APK file that would normally come from the App Store and installs it on the phone. It hasn't just 'bookmarked' the page. If you don't believe this then go into the settings on the phone and open the application manager. You will find Glendale App listed with all of your other apps and all of the same options available as your store-sourced apps.
If I give you a loaf of bread, it is still a loaf of bread, even though you didn't get it from a store.
It doesn't work on my iPhone!
The app does work perfectly on your iPhone, as long as you install it as explained above. You just will not receive push alerts on your phone but can get alerts via Telegram (instructions below).
Apple do not allow web apps to access to the notification system on iPhone and iPads. The advantage to them is that this forces app developers to make apps specifically for Apple products and ties both you and the developers to their brand.
Is it safe?
Glendale App is a progressive web app. They are totally safe to install on all devices. They are safer than native apps, as there are more stringent checks by your browser and phone over what they can do. They cannot access anything without your personal permission.
Web apps are a very advanced form of website that install their pages onto your phone to make themselves faster and more efficient than native apps. They use less data on your phone because the web pages are pre-installed. They don't have to be fetched every time you open the app. Think of it like a more advanced form of bookmarking a website.
They are not dangerous, native apps avoiding the app store. You don't need to override safety settings on your phone to install them. Web apps are an international standard for safely, distributing web-based applications over the internet. The Facebook Lite and Twitter app are web apps.
They install through your web-browser, so the same web app works on any and every device. You can use it as a website on your laptop and it looks like an app your phone.
I've got an iPhone!
Never mind. The app works just fine on iPhone or iPad but you install it differently to store apps. You will not find it in the App Store.
To install it:
- Open Safari.
- Go to https://aurora-alerts.uk/
- Click the SHARE button in Safari (square with an arrow):
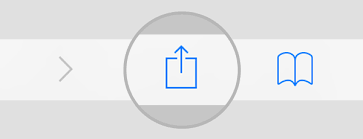
- Swipe left: 'add to home/start screen'.
- Click 'Add' in top right corner.
- The app will then be installed on your phone and there will be an icon for it on your start screen.
- Click the icon and the app will behave exactly like all the other apps on your phone.
How do I get the alerts then?
You can get alerts from the app on your iPhone but you have to be a bit devious and get them via Telegram.
Install the Telegram App and follow: Aurora Alerts UK (Glendale App)
SUBSTORMS. MOST IMPORTANT!!!
Substorms are the most important thing on Glendale App. Substorm equals aurora. No substorm, no aurora. Strong substorm, strong aurora. Simples!
In the substorm panel on the app, you will see the substorm phase and beside it a number in nanoTeslas (nT). That number is the single most important number on the app. It is the strength of the substorm and, therefore, the strength of the aurora in the sky. You want it to be big and negative called a 'big drop'. The bigger the drop, the better the aurora and the further south it can be seen. Falling (more negative) is good, rising is bad.
A substorm can drift south bringing the aurora with it. Just like a thunderstorm, the closer it comes to us the better we see it.
A substorm goes through three phases, which can take many hours to complete. These are called 'growth', 'expansion' and 'recovery'.
The best aurora happens in the expansion and recovery phases. In the growth phase, the aurora is just developing, charging up.
The point when the substorm switches from growth to expansion is called 'onset' by scientists or 'the aurora's kicking off now' to normal folk. This app is the only app in the world that is able to tell you that the 'aurora's kicking off now' because it is the only app in the world that is tracking substorms.
The substorm strength indicator takes account of the latitude to which the auroral oval has extended. This means that you can gauge when you will catch it based on the strength at the time you last photographed it. For example, if you normally catch the aurora at your location when the substorm strength reaches -400 nT then you should be out looking for it whenever the indicator is dropping towards that level. The threshold at which aurora becomes visible for you will be lower the closer to the auroral zone you are (further north in northern hemisphere, further south in southern hemisphere). You will very quickly get used to it and understand the level at which you need to take heed.
Active Substorm
When a substorm is active, you will see information displayed showing when it started, peaked in its growth and expansion phases, together with the peak strengths in each phase.
Beside the strength value you will see an arrow appearing. This indicates whether the value is rising or falling and how fast it is changing. When a substorm is active then the arrow pointing downwards is good. The steeper it is dipping, the better.
IMF/Bz also important!
Lots of scary numbers in this panel, so what do they all mean? Well it's all about how well the magnetic field carried by the solar wind is aligned with that of the Earth. When they are well aligned a substorm will develop, so when you see the 'now' and 'next' rows lit up in pretty colours there is going to be some activity in an hour or so. If there's already activity more will follow later.
If the 'next' row is no longer lit up then activity will gradually start to fade away again but there can be a burst of activity, as the energy trapped during the growth period gets released, so give it an hour before you head to bed.
When using the IMF panel it is vital to understand that a well-aligned IMF arriving at Earth NOW does NOT result in aurora until 1 to 3 hours later. This is why it is very useful for deciding in advance whether to head out tonight.
When the Bz arriving at Earth suddenly flips negative, a substorm begins to develop. Aurora doesn't happen right away. It's like piling up logs to make a bonfire and then in 1 to 3 hours they get set alight. In most cases, the Bz will be firmly positive when the aurora is actually happening.
Substorms can also overlap. If the Bz stays negative while a substorm is in expansion or recovery then another substorm is starting to develop in parallel. You've got one bonfire lit and you're piling up the logs to make another bonfire alongside. The next one gets lit on average 3.5 hours after the first one.
When a substorm is in its expansion phase, the IMF values have absolutely no relevance whatsoever to that activity. Substorm strength trumps every other metric. If the substorm strength is -400 nT, for example, there is a nice aurora happening even if all the IMF rows are totally black.
Beware of looking at IMF figures on other apps and websites, as those are not referenced at Earth but at a satellite a million miles from Earth. It will be 2 to 2.5 hours before those values will result in aurora at Earth.
You read the 'prev', 'now' and 'next' rows just by looking at the colours. The more boxes that are coloured the better the alignment. A red box is better than an orange box is better than a yellow box.
IMF 'NOW' is all about the future, not the present, we use it to decide whether to head out and also to tell us when it is good to go to bed.
The trendlines show the Bz and Bt that is arriving at Earth now (left) and as far into the future as it is possible to see, at L1 satellites (right). The black line shows the optimum ('ideal') Bz. You want the middle line (Bz) to be below the blue shaded (ambient) area and as close to the black line as possible. When the middle line meets the black line, the IMF is perfectly aligned which creates the optimum conditions for a future substorm to develop.
The three values shown beneath the trendlines are the Bz at Earth (left), the lowest inbound Bz (centre) and the Bz at L1 (right).
Occasionally communication is lost with the satellites and the app will tell you that satellite data is unavailable. Satellite data dropouts are not related to solar activity in space. A monster eruption didn't knock out the satellites! They are due to there not being a ground station able to receive the data they are transmitting.
For the radio signal to travel from satellite to Earth there needs to be a receiver on Earth, with reasonable line-of-sight, that is tuned to that satellite. Most ground stations are located in the northern hemisphere, which during winter is tilted away from the sun creating more void periods when there is no receiver able to pick up the signal. Also, they tend to do maintenance work on the ground stations during winter, so this also creates more gaps. Void periods are nothing to get even slightly excited about. It is totally normal, especially in the winter of the northern hemisphere. Always use Glendale App for your satellite data, as it automatically switches to the most accurate available source of data if any satellite loses communications.
Advanced
There is some more technical data in this panel that beginners can ignore. It is only shown to more experienced users of the app.
Dipole indicates how far the Earth's magnetic pole is tilted in degrees (relative to the ecliptic). The two angles are the amount of tilt in the X and Y GSEQ axes respectively. The RM effect is the amount of By in GSEQ axes that is currently being transformed into negative Bz in GSM axes.
Magnetic Structure indicates the type of IMF that is arriving at Earth. Radial is the commonest type, which is produced by both coronal hole streams and the ambient IMF. Flux ropes are features of the IMF that are usually associated with coronal mass ejections.
'Magnetosphere' indicates modes of the Earth's magnetosphere, e.g. Steady Magnetospheric Convection. SMC generally produces continuous, but boring, aurora until it breaks or periodically erupts at approximately 3.5 hour intervals.
Solar Wind & Shock Stack
The speed and density of the solar wind don't directly matter that much for aurora-hunting. They just tell us whether the Earth is passing through a stream of particles from a coronal hole (CH) or a coronal mass ejection (CME). It is the IMF that the solar wind carries that is more important. Many of the best substorms occur in the turbulence called a 'stream interface' when the Earth is passing between low and high speed particle streams.
When a substorm is active, especially in its expansion phase, the solar wind speed and density have absolutely no relevance whatsoever. Substorm strength trumps every other metric. If the substorm strength is -400 nT, for example, there is a nice aurora happening even if the speed and density are at ambient levels.
Imagine a town called 'Sun' and a town called 'Earth' are joined by a railway. Freight trains (solar wind) continually run from Sun to Earth carrying random loads of either water (+ve IMF) or booze (-ve IMF). When a train-load of booze arrives at Earth, it takes an hour to unload the wagon and then it's party-time. When the train is carrying water, it doesn't matter how fast the train travels or how many water trains (density) there are on the track, there ain't going to be no party. When the train is carrying booze, there's going to be a party, whether the driver tootles along at 1 km/h or he puts his foot down, there will still be a party. It's their cargo that matters, the speed of the train makes no difference to the party.
So why do we care about speed and density? Well, generally, when the speed and/or density are elevated we often get better quality IMF too. Better booze, livelier party! Whisky anyone?
The trendlines show the solar wind speed (V), density (N) and temperature (T) that is arriving at Earth now (left) and as far into the future as it is possible to see, at L1 satellites (right). Also included here is the overall IMF strength (B).
We use speed and density primarily to look for space weather events. When both speed and density are rising it normally indicates arrival of a co-rotating interaction region. When speed rises and density falls this normally indicates a coronal hole stream.
The primary reason for using speed, density and temperature is to look for shock signatures. Shocks produce a simultaneous, sharp, step increase across all the solar wind parameters. They indicate that a coronal mass ejection is going to hit the Earth in about an hour.
The trendlines are stacked vertically to make it easy to look for shock signatures. I call this the 'shock stack'. You will see a simultaneous step increase in all four graphs when an interplanetary shock has hit the satellites. The shock signature will be highlighted on the graphs to make it obvious to you.
You may sometimes see random, big steps and spikes on the trendlines. These are because one of the satellite data feeds has gone offline and the app switched to an alternate feed that has different readings. Don't confuse these with shock signatures.
The 'ions & electrons' trendline shows suprathermal particles arriving at Earth. Ions are the thick line and electrons are the thin line.
Suprathermal ions rise sharply ahead of an incoming transient event, such as a coronal mass ejection. If you see the ions rising steadily over many hours, or even days, then suddenly start to ramp up fast, it is indicative that a shock is approaching.
Suprathermal electrons can also begin to rise immediately after a powerful solar flare, e.g. an X class flare. This can indicate that the flare produced a CME with an Earth-directed component.
Coronal Holes
Coronal holes are openings in the sun's magnetic field that allow plasma to escape into space. When these holes are facing Earth, the solar wind emitted from them can cause auroras 3 to 4 days later. These holes can remain open for several months, providing regular, predictable, repeating auroras at 27 day intervals.
The 'now' tab highlights any coronal holes that are currently on the solar disk. They move from left to right. When they are in the centre laterally, the solar wind from them is being directed towards the Earth and will arrive in 3 to 4 days.
The '-27 days' tab allows you to compare the sun now against how it looked on the last rotation. This allows you to see whether the holes are still open and whether they have got larger or smaller.
The '-4 days' tab allows you to see the coronal hole that is affecting the Earth today as it looked when in the Earth-facing position 4 days ago.
You will often see coronal holes referred to as either positive or negative polarity. Do not confuse this with the IMF Bz value being positive or negative in the solar wind from the hole. The polarity of the holes actually relates to their IMF Bx value being towards the sun or away from the sun.
| Hole Polarity | IMF Bx | Phi |
|---|---|---|
| Positive | Bx < 0 (-ve) | Away from the Sun |
| Negative | Bx > 0 (+ve) | Towards the Sun |
You may also see the acronym SNAP (Spring Negative, Autumn Positive). This is an academic theory that in March/April a negative polarity hole will statistically produce more periods of negative Bz and, therefore, better auroras. Conversely, in September/October a positive polarity hole will theoretically produce better auroras. Just ignore this as it has no practical use for aurora hunting. Any polarity of hole can produce great auroras in any season.
Coronal Mass Ejections & Shocks
Solar flares and filament eruptions on the sun can propel bursts of plasma called Coronal Mass Ejections (CMEs) out into space.
Glendale App is constantly analysing solar imagery, after a flare, to identify whether a CME occurred and will show a graphic highlighting the outline of the CME emerging from the sun.
What you are looking for is the CME outline completely encircling the sun, which indicates that the CME is aimed directly at Earth. This will give the maximum possibility of strong auroras when it reaches Earth 2 to 3 days later. This is known as a 'full halo' CME.
Even if the CME outline only surrounds half of the solar disk there is a chance that part of the CME will hit Earth. This is called a 'partial halo' CME.
Confusingly, CMEs sometimes happen from a flare on the far-side of the sun at the same time as a flare on the Earth-facing side. When more than one active region of the sun fires a flare simultaneously these are called 'sympathetic flares'.
Far-sided CMEs can also produce a full or partial halo in the imagery BUT the CME will be heading away from Earth rather than towards us. A more detailed inspection of solar imagery is required to determine whether a halo CME is headed towards or away from Earth.
CMEs are very powerful eruptions and when they hit the satellites that measure the solar wind, around a million miles from Earth, cause a sudden, sharp, step increase in the figures called an Interplanetary Shock.
Glendale App will automatically issue an alert when the shock is detected and it will then hit Earth within 1 hour. In the immediate hours after a shock hits Earth the strongest of all auroras can occur, so you need to be ready and pay close attention to the app after any shock.
Sometimes you will see a shock alert marked with a question mark (?). This is because the shock was detected using a satellite that is not reliable at measuring solar wind plasma data. That means that the shock alert might be false. You should look for large steps in the trendlines in the solar wind panel of the app to confirm that the shock was genuine when it has been questioned.
Even when there appears to be an Earth-directed component or it looks like a direct hit, the CME can still miss completely or bounce off the Earth's magnetosphere. Don't get too excited until the app alerts that a shock has been detected!
Don't take any ETAs too seriously, either here or on other sites, as they are only a very rough guide.
After an Earth-directed CME occurs your social media influencers, newspapers and TV news will start hyping up the predicted event. Just ignore this until Glendale App has alerted the shock.
DO NOT load your kids into the car and drive six hours into the middle of nowhere based on any forecasted arrival time. The predicted arrival times are total guesswork. Wait until the shock happens and you will still have a few hours to drive somewhere, as it takes a while for the activity to reach Earth and build-up.
Solar Flares
Solar flares are eruptions of electromagnetic radiation from active regions, a.k.a. sunspot groups, that can propel bursts of plasma called CMEs towards the Earth. These take 2 to 4 days to reach Earth and, when they arrive, can trigger strong substorms. Most flares don't produce CMEs and most CMEs miss the Earth, so the best the figures in this panel can do is get our hopes up!
Flares are classed A, B, C, M or X with A being weakest and X being strongest. The number indicates how strong the flare was within its class.
After a flare, it can take several hours before imagery becomes available that enables us to determine whether there was a CME and whether that CME was Earth-directed. After a flare, keep checking the Coronal Mass Ejections panel for the latest updates as imagery arrives.
The image shows the active region that was the source of the most recent solar flare, highlighted with a circle. When there have been no recent flares it shows the latest image of the solar disk.
Knowing the source of the solar flare is useful because a strong flare from a centrally located active region will be in the Earth's firing line if it produces a CME. If the source was close to the edge (limb) of the solar disk any CME is likely to be directed away from Earth.
Sometimes there is a delay before the flare imagery becomes available, so it might take 5-10 minutes to show the flare source after the app has alerted you about a stronger flare. Just keep checking until the image arrives.
The active region numbers are labelled on the image and are colour-coded based on their magnetic complexity. The more complex a region, the more likely it is to produce powerful flares.
The colour coding is as follows:
| Colour | Classes |
|---|---|
| White | Alpha |
| Yellow | Beta |
| Orange | Gamma Types |
| Red | Delta Types |
| Purple | Beta-Gamma-Delta |
You don't need to understand what all the classes mean unless you are interested in heliophysics. For aurora-hunting, you just need to know that the better the colour, the more chance there is of a strong flare and, hopefully, a CME.
Twilight Times
You need to know when it is dark enough to see auroras, so the app has all of the times that you need for aurora-hunting.
There is nowhere else on the internet that gives you the sunset, twilight and moon times for tonight, rather than 'today', which is essential for aurora-hunting. It is the only app that tells you when the twilight ends tonight and starts again tomorrow morning. It tells you precisely when it will be dark where you are tonight.
Looking ahead for a holiday?
You need to use the long-range forecast! This is the most accurate long-range forecast that you will find anywhere. Other long-range forecasts are based either on guesswork or effects felt at a satellite that is a million miles away from Earth. This long-range forecast is calculated from actual substorms that directly affected us and when those substorms are most likely to recur again.
You have to be a bit flexible with long-range predictions. If the app says it will occur on say 5th/6th you might find it actually happens on 4th/5th or 6/7th. Don't just book a single night. Book the night before and the night after too to make sure you have it covered.
There's a simple reason for this. The rotation period of the sun is 27.5 days and it is the half a day that scuppers us. It means that on the next rotation a particle stream that caused a strong substorm at night is going to arrive in the day, so the substorm might happen a night earlier or a night later.
The coronal hole that produced the particle stream may shrink before the next rotation but it might also have got bigger. It is not unusual for a coronal hole to stay open for several months producing regular auroras on each rotation. It is important to keep checking the Coronal Holes panel on the app for the latest updates on the approaching hole in the week before your holiday.
If you are looking at the long-range forecast during the years around the solar maximum, you will most likely be scratching your head and thinking this is just nonsense. That's because coronal holes close up around the solar maximum years. When we get out of the solar maximum, and the coronal holes come back, you will be using the long-range forecast constantly, to accurately plan your aurora hunting for the month ahead. It's not entirely useless during solar maximum, as the active regions firing off CMEs are also going to come around again but its just not a given that they will erupt in the same way.
The long-range forecast should only be used for dates that are 9 to 27 days into the future. Less than 9 days ahead we are able to see what is actually coming via the Coronal Holes panel, so use that instead. Less than 3 days ahead we can also see whether any actual transient events are coming by using the Coronal Mass Ejections panel.
For nights that look promising the app tells you what the moon and twilight situation will be. If you can avoid it, you don't want to book a night when the moon is bad for auroras.
Say you fancy a weekend up north to chase aurora. You look at the long-range forecast and choose the dates that have activity predicted and no moon. You don't choose the weekend that has no activity predicted and a big moon. It's about increasing your probability of catching aurora. Upping your odds of getting something rather than coming home empty-handed.
This panel should NOT be used for tonight. Use the live data in the substorm panel and the nowcast for tonight.
This panel should NOT be used for tomorrow or any date within the next 9 days. Use the coronal holes panel, as it will show the latest update on the actual holes on the solar disk.
The dates in colour relate to coronal holes. These are highly repeatable and give a good chance of a repeat performance.
Dates in black relate to coronal mass ejections. These are eruptions from active regions (sunspots, filaments) on the sun. The active region will rotate into the same position again but there is less chance of it erupting when it gets there.
Dates that are missing had no coronal hole or active regions affecting Earth on the last rotation, so no known chance of anything on the next rotation.
The point of the long-range forecast is for booking time off work a few weeks ahead that will give you the best chance of catching aurora. If you want to know whether there is a chance at the weekend, you do not use this forecast, you look at the coronal holes panel and coronal mass ejections panel, as we can see with some certainty what our actual prospects are over the next week or so.
The reason that figures are shown for dates over the next week is to allow you to gauge how strong activity was previously when you know from the coronal holes panel that a hole is still there and definitely coming into play again. The figures for the next 9 days mean nothing if the hole no longer exists.
I don't have a phone!
If you don't have a phone just use the app like a website on any desktop PC or laptop. Use the Chrome or Firefox browsers. Enable alerts and just leave it running in a tab whenever you are using the computer. You will get the alerts popping up in the bottom corner of your screen.
I don't have any mobile signal!
The app will switch to use wi-fi when you do not have a mobile signal. It will work perfectly over the wi-fi in your house, so you can use it whether you are out on an aurora hunt or sitting at home waiting for it to kick off.
If you lose your signal on an android phone while out hunting auroras, the app will have stored all the essential information on your phone, so you can still use it. You can also make aurora sighting reports while your phone is offline and they will automatically be sent out as soon as you get a signal again.
Tell me about the alerts
The app will send you alerts if you enable them on your Android device or in the Chrome, Firefox or Edge web browsers on windows desktops and laptops.
The alerts are sent out automatically by the app at important points in the development of the substorm. These are:
| ONSET | Aurora is just starting to kick off. |
| YELLOW | MINOR Geomagnetic Substorm. |
| ORANGE | MODERATE Geomagnetic Substorm. |
| RED | STRONG Geomagnetic Substorm. |
| MAJOR SEVERE EXTREME | Additional levels indicating exceptionally strong auroras. Do not miss these. |
You have to be realistic with alerts. If it is cloudy, you won't see anything. Even a bit of haze might kill it. Moon can kill it. Light pollution kills it.
If you are lucky enough to live in Northern Scotland, Iceland, Southern Scandinavia, central Canada or Tasmania then you should be heading out with your camera as soon as you get the onset alert and by the time the red alert goes out the aurora will be amazing. Even on the onset alert only, you'll be in with a chance of some aurora.
However, if you live further south then you need to treat onset and yellow as pre-warnings, get your camera ready, put your coat on, maybe even jump in the car if you have a journey to your viewing point. The orange and red might not happen. You have to take a gamble and eventually you will get lucky. If you do get a red alert, go for it!
You may get alerts before it is properly dark where you are because places to the east of you are already dark when the substorm begins. Use this as an advisory to be ready as soon as it gets dark where you are.
The app is tracking the substorm hours before the alerts are sent, so if you check the app regularly you can follow the development of the substorm and head out to your viewpoint ahead of the alerts. Then you can use the alerts just as a backstop in case you forget to check the app.
Alerts via Telegram
You can get alerts from the app on your iPhone but you have to be a bit devious and get them via Telegram.
Install the Telegram App and follow: Aurora Alerts UK (Glendale App).
I would also advise Android users to subscribe to alerts from Telegram as a backup.
I really want to get an aurora!
A lot of people do and, because the alerts on my app are free, lots of people subscribe to them, just because it doesn't cost them anything. Many of them quickly lose interest when they realise that catching auroras means standing outside on cold, dark nights at stupid o'clock.
What the app does to counteract this, and help those who are serious about aurora-hunting, is to prioritise the alerts.
If you use the app regularly, every day, submit live reports and enter your proper name/location into the aurora reporters box the app will know that you are serious. It will automatically put you at the top of the queue for alerts.
If you never use the app, never report anything or enter junk in the aurora reporters box you will stop being sent them.
What's Expansion Alarm?
The expansion alarm is a loud beeping that the app will make when a substorm goes into its expansion phase. It is intended for use on any desktop PC, any laptop or non-Android tablets. Let's explain how I use it and why I created it...
Before the Glendale App existed, to find out when a substorm was going into its expansion phase we had to sit constantly watching a graph on the computer called the 'stackplot'. When the stackplot dipped, we were game on. However, this meant constantly sitting in front of the computer all night watching the graph. You could guarantee that the moment you went off to watch something on telly, or dozed off on the sofa, the aurora would kick off.
I have a desktop PC in my sitting room, so nowadays I just leave the app permanently running in 'alarm mode', switch off the screen-saver and power-saver on the computer and go off to do other things. I can watch the telly, have a nap on the sofa, relax and as soon as the aurora kicks off the 'puter starts beeping its head off and wakes me up.
Even better, the app gets the data ahead of the Stackplot graphs, so the 'puter is bleeping before the graphs have even started to dip!
The expansion alarm works a bit like your 'getty-uppy' alarm clock. When it goes off, there's a 'snooze' button you can press that will stop bleeping until there is another surge in activity.
Enabling and Setting the Alarm:
- Click 'Enable Expansion Alarm' in the 'Alerts & Settings' panel.
- That enables the alarm controls but does NOT start the alarm.
- The button to turn the alarm on is beside the User Guide and FAQ buttons on the bottom toolbar.
- Press the 'alarm' button and the app switches into 'alarm mode'.
- It will bleep when you start it, so you can check the volume.
- The screen will show substorm essentials, with 'snooze' and 'stop' buttons.
- When the alarm goes off press 'snooze' to stop the noise until the next burst of activity happens.
- Press 'stop' to exit alarm mode and return to the normal app screen.
What are Activity Alerts?
Activity alerts are notifications sent to your device to keep you fully updated on everything that is happening. On a night with good aurora it will ping a lot! The feature is intended primarily for desktop users but works on phones and tablets too.
It is very useful for serious aurora enthusiasts and admins of aurora-based social media sites, as it will ping you about:
- All escalating activity (big dips on the magnetometers), e.g. "Major activity level reached".
- Aurora being reported by trusted users, e.g. "Aurora reported from Glendale, Skye by Andy Stables".
- Photos being uploaded to the app, e.g. "Photo from Glendale, Skye uploaded by Andy Stables".
Will it work in Iceland, Scandinavia, Canada or Australia?
The app will automatically switch into the correct mode for your country as soon as you step off the aeroplane. It will provide alerts exactly as it does in the UK version but, if you are closer to the auroral zone, it will most likely be visible to the naked eye on the yellow alert and will be excellent by eye by the red alert.
It is important that you step outside and look at the sky, or take a photo, as soon as the alert is issued. The most vivid, intense displays usually occur within minutes of the alerts being issued, so you need to react quickly. If you see a big red or orange arrow pointing downwards in the Substorm panel on the app, you need to go outside and look at the sky, as this in when the aurora becomes most active.
If you are using the app in the UK but want to view the Iceland/Scandinavian/Canada/Australiasia sightings, swipe left or right on the map to toggle between regions.
I have been working with Caroline Weir of Aurora Iceland to develop the Iceland version of the app. Caroline has been conducting research in Iceland that mirrors my own work here in the UK and, as a result of our collaboration, this app is the only accurate one for Iceland.
Caroline's Aurora Iceland website has essential advice on aurora-hunting in Iceland and I recommend that you read it before your visit. You should also follow her facebook page Aurora Iceland Facebook to see her amazing photos.
The app has also been tested and proven to work 100% accurately in over 20 countries worldwide for both Northern and Southern Lights.
Guidelines for Reporting
- If you click the wrong button by mistake, press the button you intended immediately and it will auto-correct.
- Do not click 'nothing' when your northern horizon is cloudy. 'Nothing' means the sky is clear and there is no aurora on your photos, i.e you are confirming that there is definitely no aurora.
- Whilst you are still getting aurora on camera, keep clicking the 'aurora' button periodically, especially if it escalates.
- In the UK or similar latitudes, do not click the 'aurora' button if you are only using your naked eyes.
- If you abuse the 'full name' or 'location' fields you will be blocked from the app.
- If you abuse the photo uploads you will be blocked from the app.
- You can still report sightings when your phone has no internet access. They will be stored and transmitted once you get signal again.
- You can delete a mistaken aurora report in the 'Your History' panel.
- If you use the app a lot without reporting your sightings you will be downgraded and removed from the alerts list.
- Do not report 'aurora' if all you see is pink/red without any rays or structure. Report this as 'diffuse'.
Reporting in Twilight
When the sun is between 12 and 18 degrees below the horizon the sky naturally often appears shades of pink, lilac or purple (twilight colours) due to refraction of the sunlight. This is not aurora.
If you are shooting in twilight and getting pink/red colours it could be twilight or it could be aurora. You cannot be certain unless you catch auroral rays or structure in your photo.
If all you are getting is plain pink/red then wait until the twilight has fully ended and if you still have pink/red on the horizon then report it as 'diffuse' aurora, as you have then ruled out the possibility of it being twilight colours. However, do be wary of light pollution and moon that can also produce a pink/red horizon.
- If you report 'diffuse' aurora during twilight this will automatically be assumed to be mistaken twilight colours.
- Report it as 'aurora' only if you have some rays or discrete auroral structure in your photo.
- Wait for the twilight to end. If the pink is still there on your photos, report 'diffuse' aurora and it will be accepted.
- Reports of aurora in the twilight will not be accepted if your photo shows only twilight colours without any structure to confirm it.
Reporting in Moonlight
When the moon is up, the north horizon takes on a greenish glow, called 'moonglow', or appears brighter than other parts of the sky. This is not aurora. When the moon is rising or setting, the sky turns vivid 'sunset' type colours. This is also not aurora.
Do not report aurora when the moon is up, rising or setting unless you get:
- A distinct green arc that is clear of the horizon.
- There are distinct, identifiable, auroral structures or rays in it.
- There is a distinct pink band, or pink patches, above the green.
Height / Elevation Angle Reporting
Angles are measured by holding out your fist, thumb up, at arms length. Your four fingers then measure approximately 10 degrees.
- Never draw your first towards your face. Always keep arm out-stretched.
- Measure green of the aurora from the horizon to the top of the green band. Ignore the red/pink top.
- Measure rays from the horizon to the top of the rays.
- With arcs measure from the horizon to the top of the green arc.
- For noctilucent clouds, measure the highest part of the clouds above their nearest horizon.
- If you aren't sure, do not report a height.
It can be very difficult to measure aurora heights when you cannot see the aurora. However, there are tricks. Say you have a landmark or building in your usual view. Measure its height when it is light. Then when you take a photograph at night, use that to gauge your angles. The same trick works using a bright star or constellation but remember that they will move during the night, so keep re-measuring.
Guidelines for Uploading Photos
Only trusted users of the app, who have earned a star-rating, are allowed to upload photos. The upload button will appear beneath the photos when you are allowed to upload.
When you have the privilege, you can upload as often as you like but only your last upload will be used.
You can upload photos or back-of-camera shots taken tonight only. Your image must show aurora or, in summer-only, noctilucent clouds.
You must have been present at the taking of the photo. Uploading images from webcams, fixed cameras and cameras left unattended are not permitted.
The app uses artificial intelligence to screen uploaded photos. If it is confident that a photo is aurora or NLC, it will be shown immediately to other users of the app.
If the AI is uncertain your image shows aurora or NLC, it will be submitted for approval. You will see a message on the app telling you that it is pending approval. This does not prevent you uploading again. If you get a better photo you can still upload that and the AI will let it through. This often happens with back-of-camera shots where you didn't hold the phone straight or you don't have the camera screen filling most of the frame. Try to take a cleaner photo of the camera screen or download the image off the camera and upload it again.
The uploads feature is intended for users to quickly show others what they are getting, while it is happening.
Any abuse of this facility will result in the automatic removal of your uploads facility and potentially a ban from the app.
Any photos that do not show any obvious aurora or NLC will be taken down. If you get a better photo then you can upload again but make sure that the image definitely contains aurora or NLC. Repeatedly uploading shots of light pollution or other off-topic subjects will result in your upload permission being removed.
Photos showing only twilight colours will be removed.
Photos that have overly manipulated colours or have white balance changes to alter colours will be removed. Please use auto white-balance (AWB).
Ensure that your photo shows some obvious structure to the aurora before uploading.
Photos containing watermarks that are effectively adverts will be removed.
If you feel strongly that one of your images was removed unfairly, please feel free to send me the RAW file for review. If you do not have a RAW file or are unwilling to supply it then please don't bother to raise it, as it will not be possible to verify your image.
Getting the best out of the App
- The app will tell you in advance whether aurora is likely tonight.
- The app will be firming up its forecast for tonight by late afternoon, so starting checking it periodically.
- Make sure you check the app before dark in case it is telling you that aurora is likely as soon as it gets dark.
- Once it gets dark, the app will start sending the push alerts and triggering the Expansion Alarm as soon as anything happens but keep checking it periodically.
- Make sure that you check the app last thing before you go to bed in case it is telling you that activity is starting.
- Check the app when you wake up in the morning to see whether you missed anything.
- Make sure you have the app on your phone with alerts enabled (Android) or via Telegram.
Noctilucent Clouds
Noctilucent clouds (nocs, NLCs) are a rare, beautiful feature of the night sky around mid-summer in the northern hemisphere. They are much rarer than auroras. If you stayed up all night, every night, from late May until early August you would be lucky to catch them on 15 nights.
The clouds have exquisitely detailed structure, like a spider's web catching the sunlight. They don't travel across the sky like normal, tropospheric clouds (trops). Instead they remain relatively stationary but appear to expand and contract as the sun travels along below the horizon.
They can only be seen when the sun is below the horizon, showing low to the N and NNE after dusk, then expanding and shifting towards the East, as dawn approaches. They can be seen easily with the naked eye, even in towns and cities.
There is no way to predict when nocs will occur. The only way to tell if they are showing is to go out and look for them. You will see all sorts of nonsense on social media from people claiming that radar echoes and sightings in Eastern Europe foretell a show in the UK. Just ignore it.
What the app is doing to help you see noctilucent clouds is to give you the precise times when you have the optimum chance of seeing them (if they are there). These times vary dependent on your location because they require the sun to be at precise angles below the horizon. You need to be out looking at these times.
The app also shows in real-time the maximum height above the horizon at which nocs can catch the sunlight and therefore become visible.
The 'illumination profile' shows graphically, in real-time, which part of the sky the nocs are able to appear in and indicates how bright (contrasty) they will appear relative to the background sky. This is particularly useful for those new to noccing, as it will help you understand where in the sky to look for them and how their location will appear to shift and spread during the night. The illumination profile not only changes throughout each night but also every night throughout the season has a unique profile at any location.
App-Specific FAQs
Why don't the maps zoom?
This is for YOUR personal safety and security. The main reason for someone to zoom an aurora map is to try to work out where YOU are standing. YOU DO NOT want a crowd of people turning up at your special location. When YOU are out alone in the dark you do NOT want other users to track YOU down. It keeps you and your special location private.
When you see a green tick that is covered over by red crosses, zooming in to find out which village the aurora is being reported from will not help you to see it. The reason it is covered in red crosses is because either someone reported it by mistake or it has since faded. The aurora isn't hiding in a tiny village in Someshire and can only be seen that one spot. If the majority of users in an area say it's not there, then take that as a VERY LARGE HINT that it really isn't there.
Likewise, if a green tick is covered in clouds, zooming in won't help you find clear sky. You only need a well-placed opening in the clouds for 30 seconds to confirm the aurora. The gap they had is likely to be long gone. You are going to have a tough gig. You will need to get off the sofa and go look outside yourself.
What does 'Ambient' mean?
Ambient just means normal, boring, background level. Nothing interesting is happening.
Why never refresh the screen?
The app will automatically refresh the data on the screen, by itself, as fast as it is able to. It doesn't need your help. The raw instrument data is only updated at most once per minute.
When you refresh the screen, you are trying to force the app to refresh the data faster than the raw data changes. This creates pointless load on the server in responding to your requests for an update.
If you hit refresh every 10 seconds, you are creating six times the normal amount of traffic needed to keep your data fresh, without actually getting any fresh data because it physically isn't available faster than once a minute.
When you scale that up to several thousand users, all constantly hitting refresh, that kills the server.
The annoying blue popups are deliberately annoying. They are to teach you to stop refreshing. To make you use the app more efficiently. To make you learn to use your phone properly. To switch between apps without closing and re-opening them. To stop refreshing the screen every time you scroll to the top.
Server load fell by 25% when I added the annoying blue popups. That means hundreds more people can use the app at busy times.
If the blue popups are constantly appearing, the problem is not the app. You are the problem. Take some time to learn how to use your phone without constantly restarting the app.
Some people mistakenly think that the data on their app is frozen and that refreshing the screen will fix it. It won't. Just be patient. Wait a minute or two and the latest data will come. The design of the software means that it cannot become stuck in a way that refreshing the screen can fix.
One other tip for Android users is never to click on notification popups. Flick them away. Just go into the app normally. Android automatically re-starts the app if you click the notification.
Why do you insist on people's real names?
This is an active scientific research project, so I only want accurate, verifiable records to be added to my database. Also, people posting with made-up, truncated or fake names does not give other users any confidence that someone real and honest has made the report, so the trust in the app is diminished amongst the users. Your best course of action is not to report anything if you don’t want your name to appear, although that will result in your account being downgraded over time.
If you post a sighting, your name is usually only visible for a very short period of time. Only the last 10 reporting users are shown to everyone.
People using their actual name tend to carefully consider the validity of their sighting before reporting. Those hiding behind false names have no care about what they post and will fire in lots of mistaken reports. Some even do this deliberately.
If you lie to everyone using the app, and myself, about who you are then I have no confidence that you have not lied about your sightings. If I cannot trust you, I will close the account and mark all the reports as invalid.
I know that some ladies, in particular, are very sensitive about their name but have a deep think about it. I had one lady made a very big fuss about not being allowed to use an obviously made up name on the app because she didn't want her real name "appearing all over the internet". When politely declined, she posted a rant on a facebook aurora group about how her privacy had been violated. The post was on a group that had 60,000+ followers, in her real name and using an open facebook profile that revealed everything about her.